Hi. Sometimes we use POC subscription not PROD subscription.
So i try it this post.1. disk to snapshot 2. snapshot to VHD in blob 3. blob to blob(target Subscription) 4. make disk by VHD in blob 5. create vm using disk
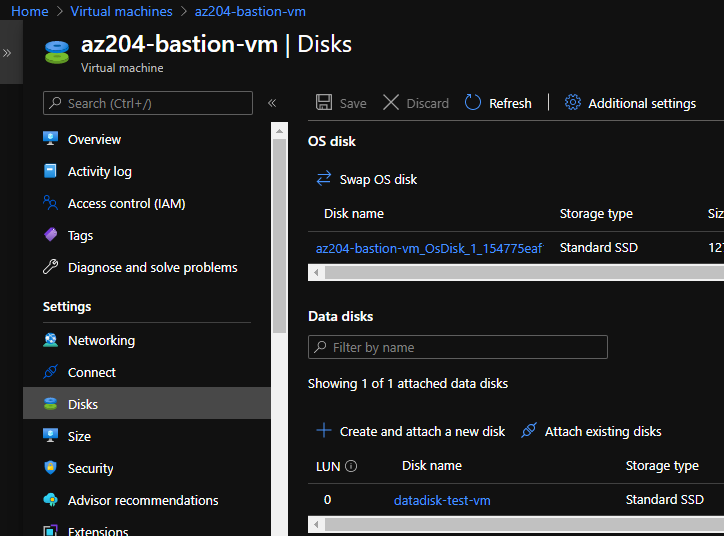
Start Demo 1. disk to snapshot I have just one VM having two disk include osdisk.
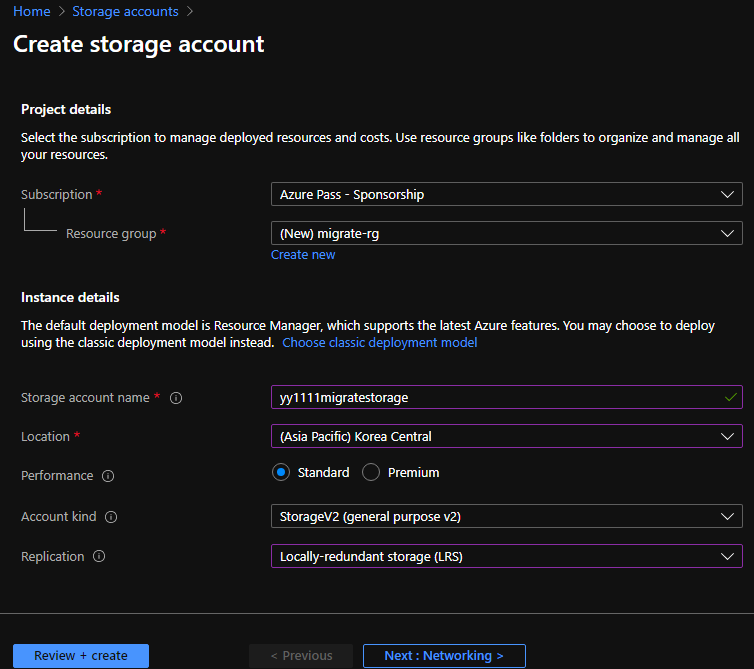
Before start demo, we have to create storage account to store vhd.
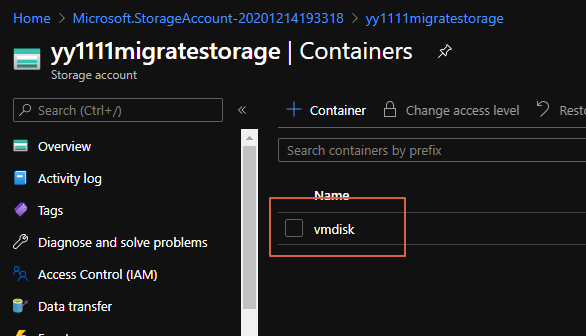
After created storage, we also create container. i named vmdisk
And we convert disks to snapshots.
1 2 3 4 5 6 7 8 9 10 11 12 13 14 15 16 17 18 19 20 21 22 23 24 25 26 27 28 29 30 31 32 33 34 35 36 37 38 39 40 41 42 43 44 45 46 47 48 49 50 51 52 53 54 55 56 $resourceGroupName = 'bastion-rg' $resourceGroup = Get-AzureRmResourceGroup -Name $resourceGroupName $location = $resourceGroup .Location $nameList = @ ( @ { name='az204-bastion-vm' ; } ) foreach ($list in $nameList ) { $vmName = $list .name $vm = get-azvm -ResourceGroupName $resourceGroupName -Name $vmName $snapshot = New-AzSnapshotConfig -SourceUri $vm .StorageProfile.OsDisk.ManagedDisk.Id -Location $location -AccountType Premium_LRS -CreateOption copy $snapshotName = 'osdisk-' + $vmName + '-001-snapshot' New-AzSnapshot -Snapshot $snapshot -SnapshotName $snapshotName -ResourceGroupName $resourceGroupName -AsJob } foreach ($list in $nameList ) { $vmName = $list .name $vm = get-azvm -ResourceGroupName $resourceGroupName -Name $vmName $dataDiskList = $vm .StorageProfile.DataDisks foreach ($dList in $dataDiskList ) { $diskName = $dList .name if (!$diskName ) { continue ; } $disk = get-azureRmDisk -ResourceGroupName $resourceGroupName -DiskName $diskName $snapshot = New-AzSnapshotConfig -SourceUri $disk .id -Location $location -AccountType Premium_LRS -CreateOption copy $snapshotName = 'datadisk-' + $vmName + '-001-snapshot' New-AzSnapshot -Snapshot $snapshot -SnapshotName $snapshotName -ResourceGroupName $resourceGroupName -AsJob } } Get-Job | Wait-Job "All jobs completed" get-azSnapshot -ResourceGroupName $resourceGroupName | format-table Name, ResourceGroupName
2. snapshot to VHD in blob. After created snapshots, we should move snapshot to blob container.
1
2
3
4
5
6
7
8
9
10
11
12
13
14
15
$storageAccountName = '' $storageContainerName = '' $sasExpiryDuration =3600 $storageAccountKey = " $snpashots = Get-AzSnapshot -resourceGroup ''foreach($snapshot in $snpashots ) { $snapshotName = $snapshot .Name $destinationVHDFileName = $snapshotName + '.vhd' $resourceGroupName = $snapshot .ResourceGroupName $sas =$ (az snapshot grant-access --resource-group $resourceGroupName --name $snapshotName --duration-in-seconds $sasExpiryDuration --query [accessSas] -o tsv) az storage blob copy start --destination-blob $destinationVHDFileName --destination-container $storageContainerName --account-name $storageAccountName --account-key $storageAccountKey --source-uri $sas }
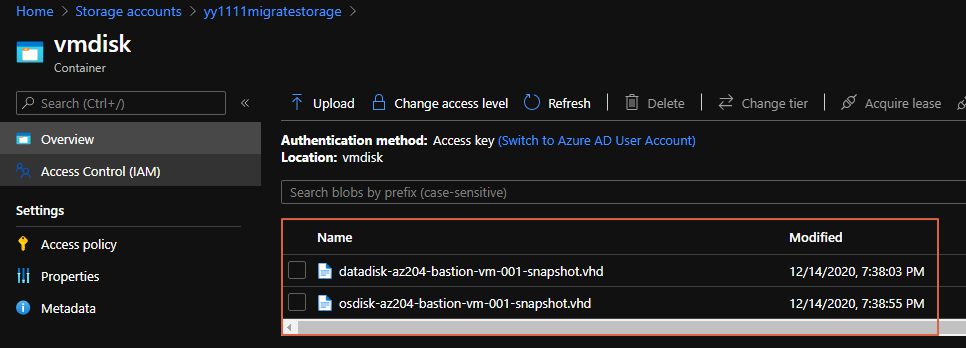
Then we check it’s working well in container.
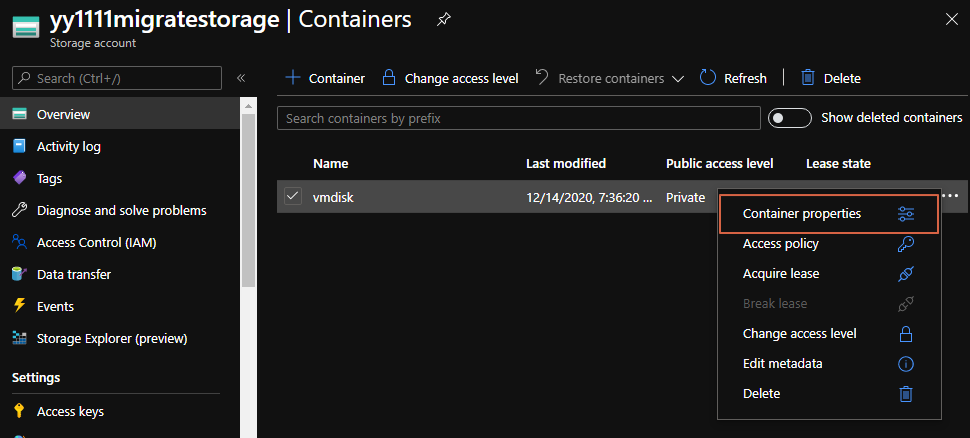
3. blob to blob(target Subscription) Need two value for this job.container path, the other one is SAS token.container properties.
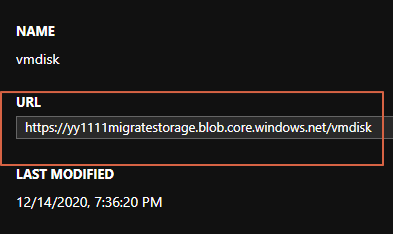
Then you check URL. memorize it for next CLI.
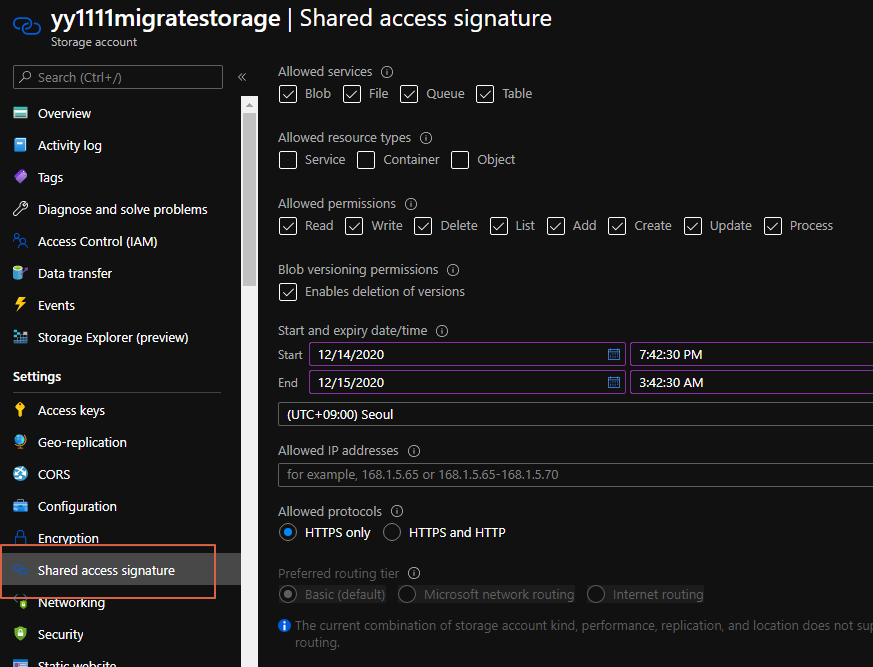
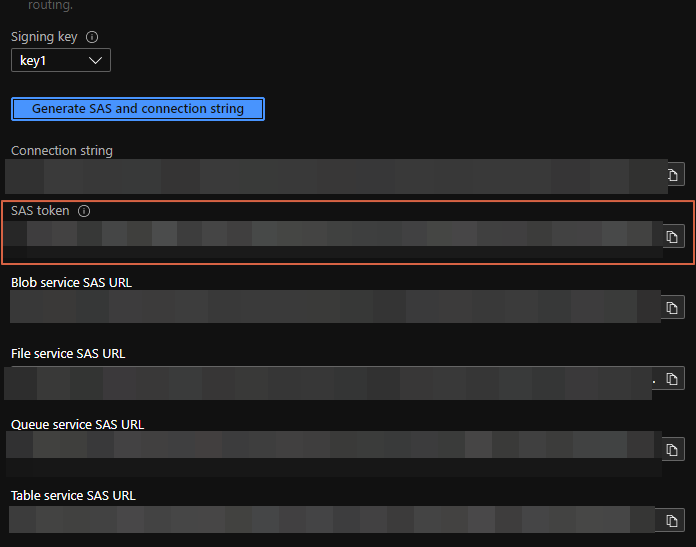
Then in the left side bar in storage account, Click the ‘Shared Access Signature’.container, and the click generate SAS ... button.
then memorized SAS token
And, you have target Subscription. create storage account and container.yy1111targetmigratevmdisktarget
3. blob to blob(target Subscription) use following command.
1
2
3
4
5
6
$srcPath = "https://yy1111migratestorage.blob.core.windows.net/vmdisk" $srcSAS = "" $destPath ="https://yy1111targetmigrate.blob.core.windows.net/vmdisktarget" $destSAS = "" azcopy cp $srcPath $srcSAS $destPath $destSAS --recursive
It’s spend a few minutes. it depends on disk size.
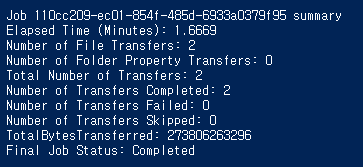
A few minutes later, process is done like under screen.
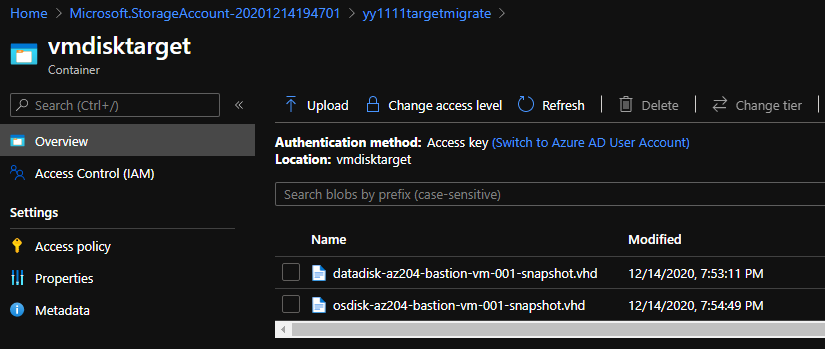
And you check target container, vhd is visible.
4. make disk by VHD in blob 1 2 3 4 5 6 7 8 9 10 11 12 13 14 15 16 17 18 19 20 21 22 23 24 25 $resourceGroupName = 'target-rg' $resourceGroup = Get-AzureRmResourceGroup -Name $resourceGroupName $location = $resourceGroup .Location$StorageAccountName = 'yy1111targetmigrate' $containerName = 'vmdisktarget' $storageAccount = Get-AzStorageAccount -ResourceGroupName $resourceGroupName -Name $StorageAccountName $list = az storage blob list -c $containerName --account -name $StorageAccountName | ConvertFrom-Json $sourceUri_prefix = 'https://' + $storageAccountName + '.blob.core.windows.net/' + $containerName + '/' Foreach ($list in $List ) { $sourceUri = $sourceUri_prefix + $list .name $osDiskName = $list .name.split('.' )[0 ] write-host $sourceUri New-AzDisk -DiskName $osDiskName -Disk ` (New-AzDiskConfig -AccountType Premium_LRS -Location $location -CreateOption Import -SourceUri $sourceUri -StorageAccountId $storageAccount .Id) ` -ResourceGroupName $resourceGroupName -AsJob } Get-Job | Wait-Job "All jobs completed" get-AzDisk -ResourceGroupName $resourceGroupName | format-table Name, ResourceGroupName
And then check Disks in the portal.
5. create vm using disk Execute following command. but, you should modify variable appropriately
1 2 3 4 5 6 7 8 9 10 11 12 13 14 15 16 17 18 19 20 21 22 23 24 25 26 27 28 29 30 31 32 33 34 35 36 37 38 39 40 41 42 43 44 45 46 47 48 49 50 51 52 53 54 55 56 57 58 59 60 61 62 63 64 65 $List = @ ( @ { name='target-vm' ; privateIpAddress='10.0.0.4' ; vmSize='Standard_D2s_v3' ; publicIpName='' ;} ) $resourceGroupName = 'target-rg' $vnetName = "target-vnet" $subnetName = "default" $nsgName = "prd-web-nsg" $storageType = 'Premium_LRS' $dataDiskCaching ='ReadOnly' $resourceGroup = Get-AzureRmResourceGroup -Name $resourceGroupName $location = $resourceGroup .Location $storageAccountName = 'osstemprddiag' Foreach ($list in $List ) { $vmName = $list .name $privateIpAddress = $list .privateIpAddress $vmSize = $list .vmSize $publicIPName = $list .publicIpName $publicIp = '' if ($publicIpName ) { $publicIp = Get-AzureRmPublicIpAddress -Name $publicIpName } $osDiskName = $vmName + '_OsDisk_0' $dataDiskName = $vmName + '_DataDisk_0' $nicName = $vmName + "-nic01" $Lun =$dataDiskName .substring($dataDiskName .length-1 ) $vnet = get-AzVirtualNetwork -Name $vnetName $nsg = Get-AzureRmNetworkSecurityGroup -Name $nsgName $subnet = Get-AzureRmVirtualNetworkSubnetConfig -virtualNetwork $vnet -Name $subnetName $nic = Get-AzureRmNetworkInterface -Name $nicName if (!$nic ) { if ($publicIpName ) { $nic = New-AzNetworkInterface -Name $nicName -PrivateIpAddress $privateIpAddress -ResourceGroupName $resourceGroupName -Location $location -SubnetId $subnet .id -NetworkSecurityGroupId $nsg .Id -PublicIpAddressId $publicIp .id } else { $nic = New-AzNetworkInterface -Name $nicName -PrivateIpAddress $privateIpAddress -ResourceGroupName $resourceGroupName -Location $location -SubnetId $subnet .id -NetworkSecurityGroupId $nsg .Id } } $osDisk = Get-AzureRmDisk -DiskName $osDiskName $dataDisk = Get-AzureRmDisk -DiskName $dataDiskName $osDiskSizeGB =$osDisk .DiskSizeGB $dataDiskSizeGB =$dataDisk .DiskSizeGB $vmConfig = New-AzVMConfig -VMName $vmName -VMSize $vmSize $vm = Add-AzVMNetworkInterface -VM $vmConfig -Id $nic .Id $vm = Set-AzVMOSDisk -VM $vm -ManagedDiskId $osDisk .id -StorageAccountType $storageType -DiskSizeInGB $osDiskSizeGB -CreateOption Attach -Windows $vm = Add-AzVMDataDisk -VM $vm -Name $dataDiskName -DiskSizeInGB $dataDiskSizeGB -StorageAccountType $storageType -Caching $dataDiskCaching -Lun $Lun -CreateOption Attach -ManagedDiskId $dataDisk .id $vm = Set-AzVMBootDiagnostic -VM $vm -Enable -ResourceGroupName $resourceGroupName -StorageAccountName $storageAccountName New-AzVM -ResourceGroupName $resourceGroupName -Location $location -VM $vm -LicenseType 'Windows_Server' -AsJob } "All jobs completed"
Thanks.
Related Posts
