This post about Azure VM Copy using snapshot.
The total process is as follow.
- OsDisk, Datadisk => snapshot
- snapshot => OsDisk_copy, Datadisk_copy
- OsDisk_copy, Datadisk_copy => VM_copy
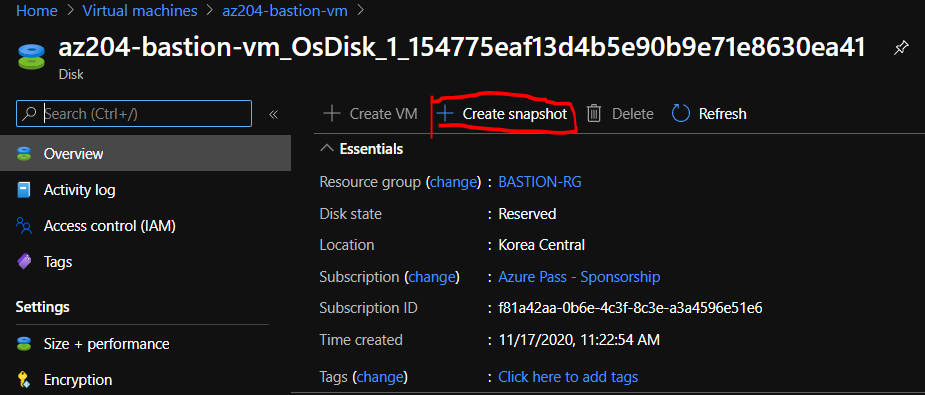
1. Create Snapshot.
Go to the panel in OsDisk. Click +Create Snapshot
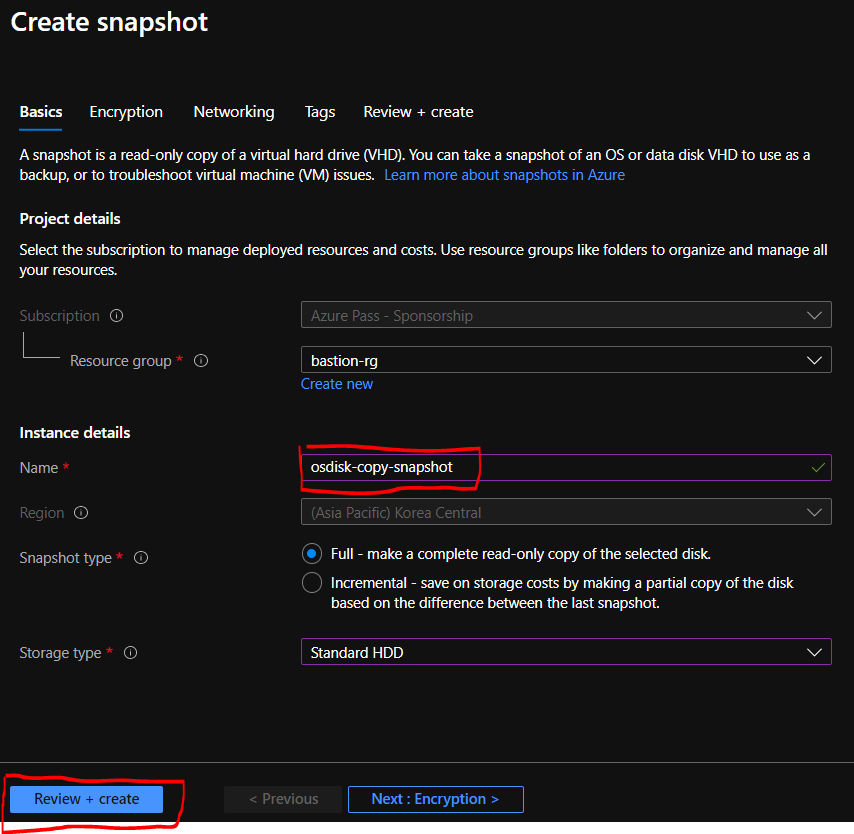
Move screen for create snapshot.
Type the name, select Storage type.
We can changed storage type after create disk in disk screen.
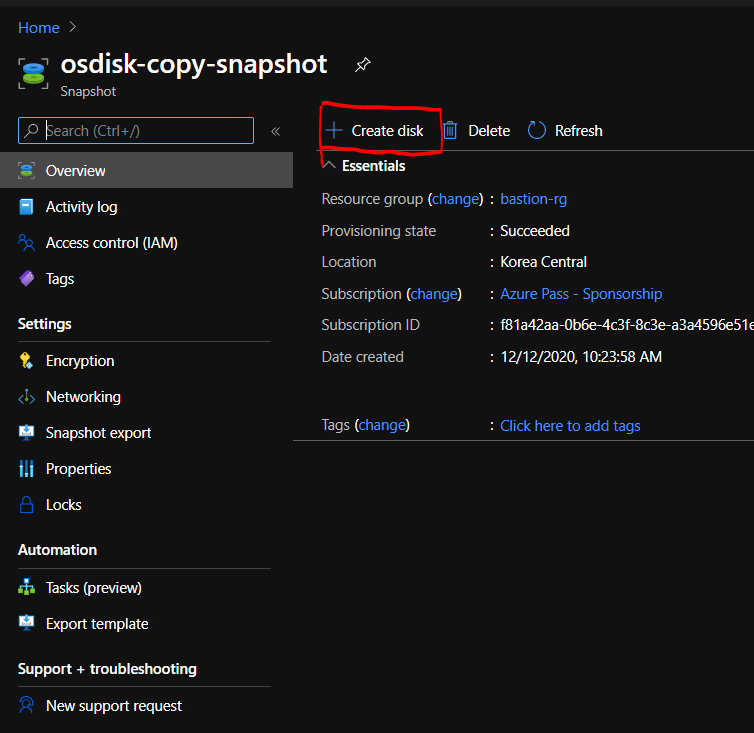
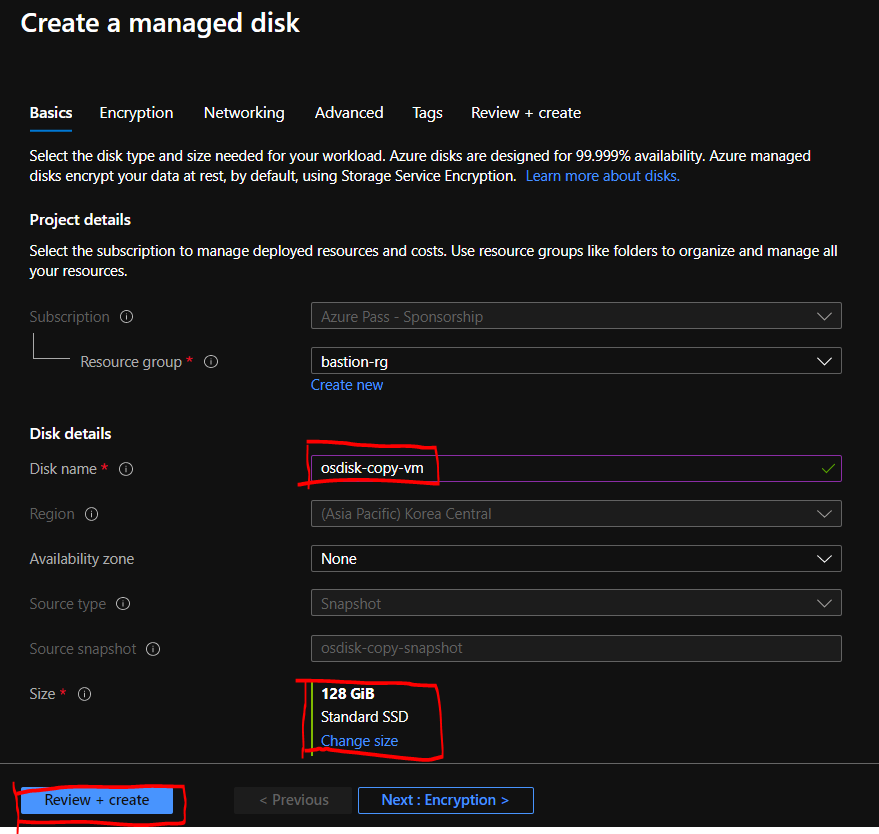
2. Create Disk_Copy.
Snapshot also create to managed disk directly.
Click button +Create Disk in upper.
Go to the screen for create VM.
Type the name and select the sku.
3. Create VM
About 30 sec later, created Disk.
And suppport create VM Directly using managed disk in Auzre Portal.
It’s very useful i think.
Click the button +Create VM and skip the creating VM.

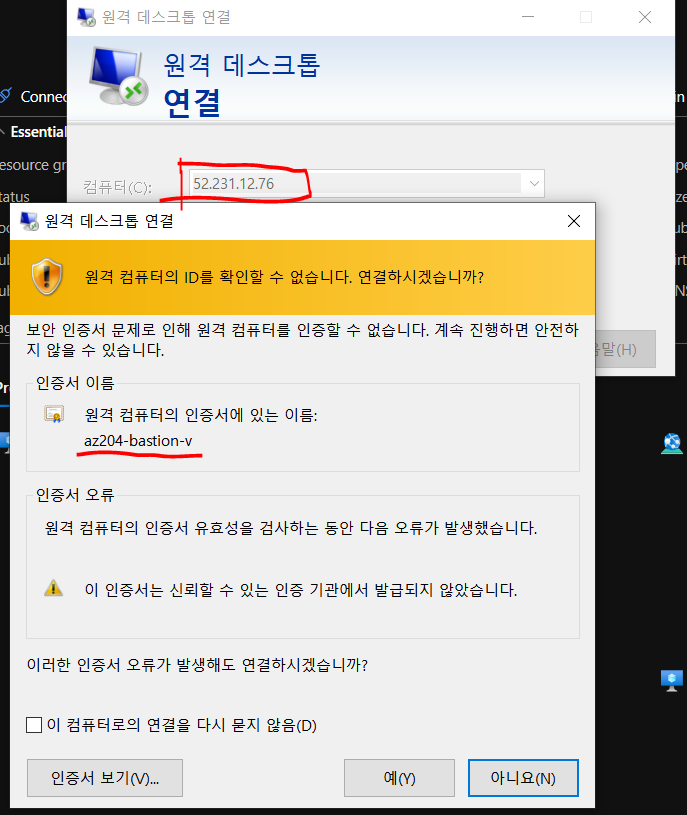
Finally deploy VM is done. we memorized public IP for connection RDP.
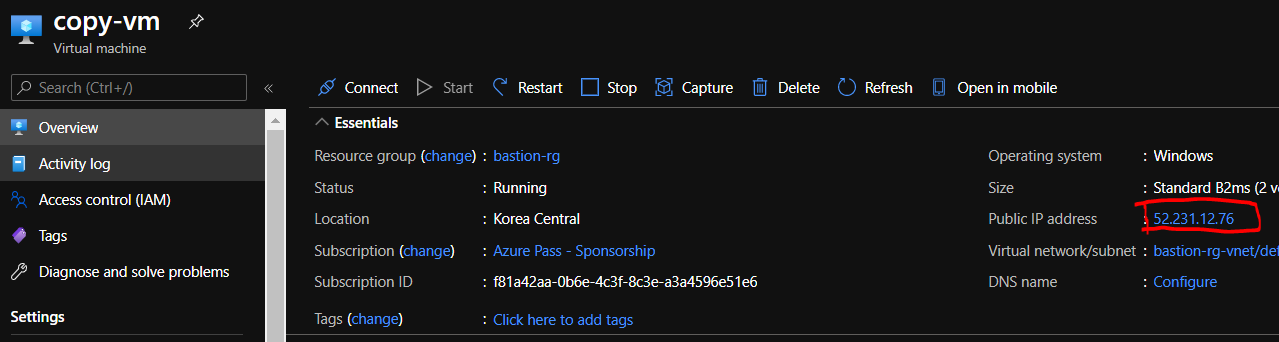
We find the certification name below. it’s VM name copied VM before.
So, we know vm copy is successful.